How to Grow Collard Greens in Florida
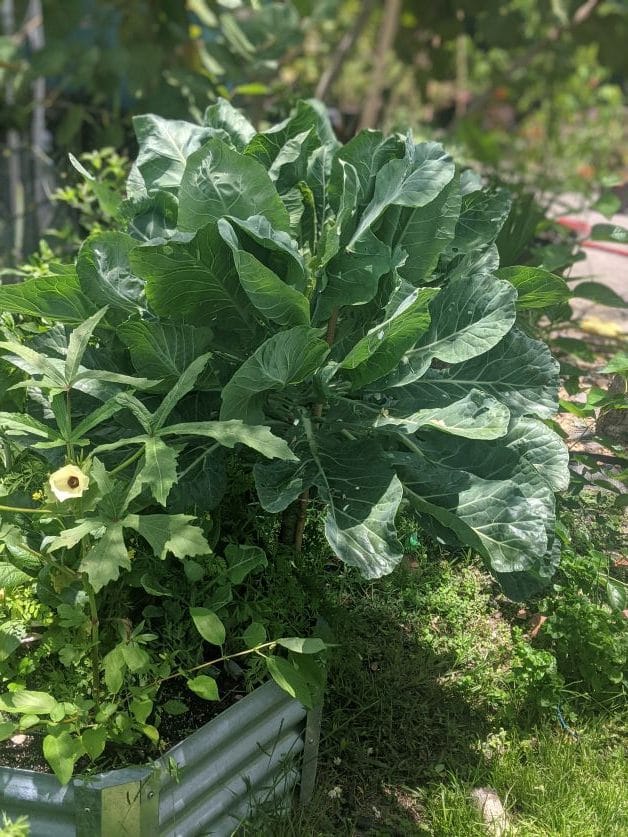
When people ask me for the easiest vegetable to grow in Florida, my answer is always collard greens. This southern staple is low-maintenance and can stand up to our extreme heat and humidity. To top it off, collard greens are a generous producer. Just 2 or 3 plants will keep your family full of healthy greens for the whole season.
Skip the spinach and lettuce (they’ll bolt on you, anyway) and learn how to grow collard greens in Florida with this comprehensive guide.
What Are Collard Greens?
Collard greens are a member of the Brassica family, making them a relative to cabbage and broccoli. People around the world eat collard greens but they’re most popular in Africa, Brazil, Portugal, Turkey, and the Southern U.S.
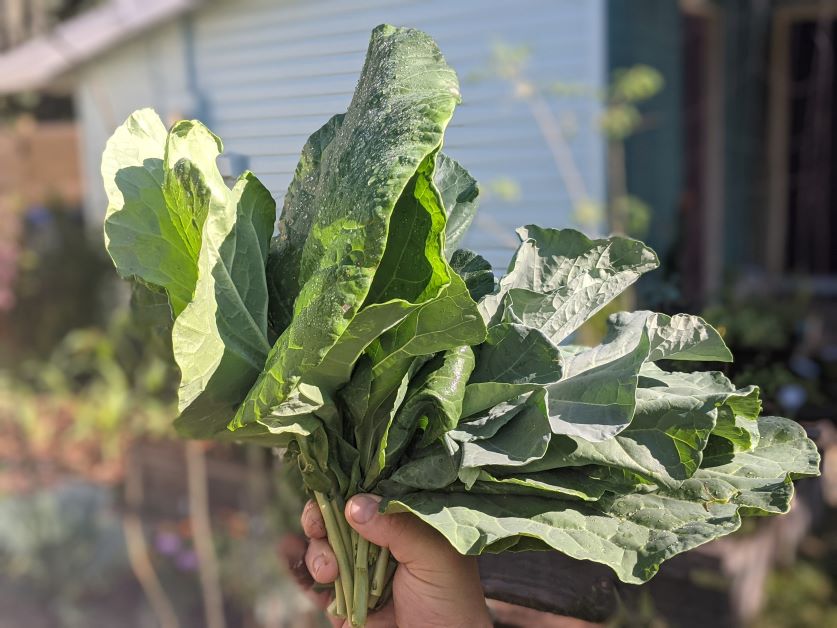
Unlike cabbage, collards don’t grow as a head. Instead, they grow on a kind of stalk as loose leaves one on top of the other. The leaves are a bit shiny and a blue-green-grey color. As the plant ages, the leaves get tougher but the taste stays the same.
Collards grow almost year-round in Florida but taste best during the coolest part of the year. If it gets incredibly hot or cold, then your collards may bolt (put out flowers). If your collard bolts, the leaves become extra bitter and inedible. Collards are biennial, which means that they bolt during their 2nd consecutive growing season. Some varieties are also more bolt-resistant than others. The 2nd season collards that I have in my garden, for instance, show no signs of bolting and it’s been in the 90s for the past few weeks.
You can eat collard greens cooked or raw, but most people eat them cooked. Traditionally, collards are slow-cooked with tomatoes, onions, garlic, and ham. I’ve also diced them fine and thrown them in salads for bulk, but I admit that raw collards are an acquired taste.
When to Plant Collard Greens in Florida
Collard greens will almost always grow no matter what time of year you plant them in Florida. For best results, though, follow this chart:
[table id=20 /]
How to Plant Collard Greens
You can plant collard greens from seed and directly sow them in your garden, or you can plant them as transplants.
In places that get true winter, planting collards via transplants makes a lot of sense. Growing collards in seed starter trays mean that you can start them indoors before the danger of frost has passed. Most places in Florida don’t get too many hard frosts, though, so whichever way you decide to plant collards is a personal preference. Do note that the UF-IFAS states that growing collards from transplants is preferable.
How to Plant Collard Greens from Seed
- Choose a planting site based on collard growing conditions. Prepare your site by amending the soil with oak leaf compost or aged manure 2 weeks before planting. If your soil is compacted, loosen it up at least 10 inches deep (preferably more). Collards have a deep root system and if the soil is too hard, the roots will have a hard time growing.
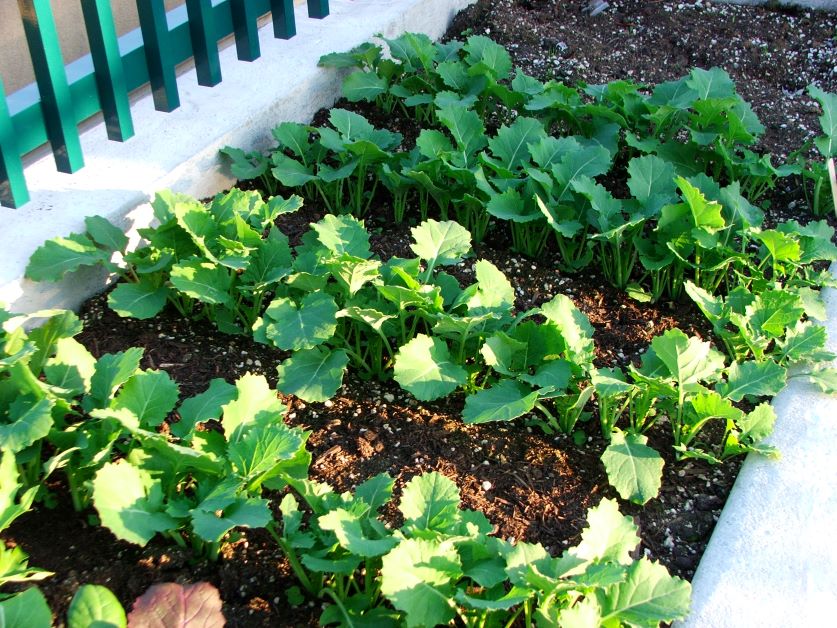
- Create a row with your finger about 1/2 inch deep. Sprinkle your seeds down the row, trying to keep each plant 6 to 18 inches apart. Once your seeds are sprinkled, cover your seeds and tamp down the soil.
- Water your seeds and keep the soil moist but not soggy. Seeds should germinate in 6-12 days.
- Thin your collard seedlings as they grow so that only 1 plant remains per 6 to 18 inches. Choose the strongest seedling to keep and pull the weakest. You can eat the seedlings as fresh greens.
Pro-tip! Using your index finger on your non-dominant hand, gently press the base of the seedling you want to keep down into the soil. Then, pull the unwanted seedling up with your other hand. This will help you keep the good seedling in place when thinning crowded plants.
How to Plant Collard Greens from Transplants
- About 4 weeks before the last hard frost, fill seed starter trays with high-quality potting mix.
- Plant your collard seeds ½ inch deep into each cup.
- Water your tray and keep your seedlings moist but not soggy.
- Keep your tray in a sunny, 75F degree location. Seeds should germinate in 6-12 days. Thin seedlings if needed.
- Prepare your planting site using the instructions provided when planting collards by seed. Transplant your collard seedlings to your prepared planting site once they reach 4-6 inches tall. Don’t forget to water them in as soon as you transplant.
Best Florida Collard Green Varieties
- Georgia
- Georgia Southern
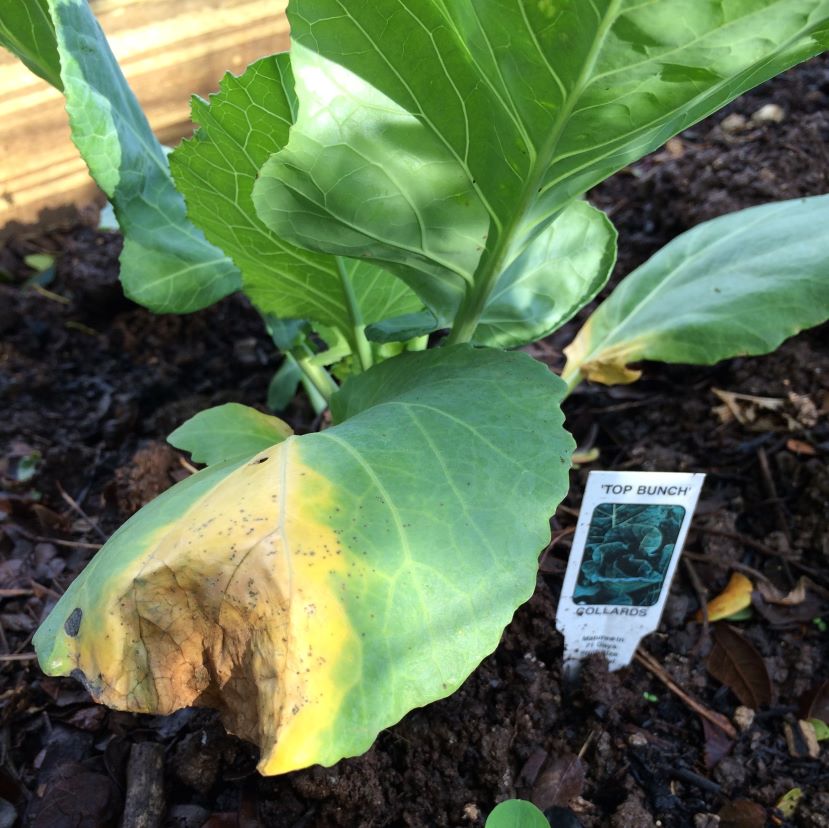
- Top Bunch
- Vates
Collard Greens Growing Conditions
Temperature
Collard greens are hardy from USDA zones 6-11. This crop can handle a wide range of temperatures but on paper, collard greens’ ideal temperature zone is 55F-75F. That being said, collards can take a light frost and most say a few touches of frost make collards taste better. They can also take high heat, but they might be bitter.
Collard greens do fine in humidity, making them a perfect choice for Florida gardeners. If you’ve tried to grow anything in Florida, you know that fungal disease is a constant battle. Not with collard greens. When my other crops are suffering powdery or downy mildew, my collards are going strong.
Light
Collard greens are a full sun plant but if you’re growing them during the late spring or summer, some shade will help slow the bolting process.
Water
Collard greens leaves are mostly water, which means the plant needs a lot of water, too. Keep the soil moist but not soggy. If you’re growing collards during the Florida rainy season (summer), then our daily rains will probably be enough. Otherwise, you should give your collards 1.5 to 2 inches of water a week.
Soil
Collards aren’t too picky about their soil as long as it’s well-draining and slightly acidic. Collards do need a lot of nutrients (something that Florida soil often lacks), so amend with oak leaf compost 2 weeks before planting.
Spacing
Mature collard green plants are big and need room to grow. Plant collard greens 18 inches apart in rows 1.5 to 3 feet apart.
A full-grown collard green plant can get more than 2 feet tall and 2 feet wide. Keep this in mind if you practice permaculture – don’t choose full-sun plants to grow next to collards because a mature collard casts a lot of shade.
Fertilizer
Plants grow foliage through the use of nitrogen. Since collards are all foliage, this means that they need a lot of nitrogen. Feed your collards organic 10-10-10 fertilizer 4 to 6 weeks after planting, especially if you notice the leaves losing color.
Harvesting
While collard greens take about 2.5 to 3 months to go from seed to harvest, they’re edible at all stages of life. If you choose to harvest early (when the leaves are about 2 inches long) you can use collards as salad greens — this is when they’re the least bitter.
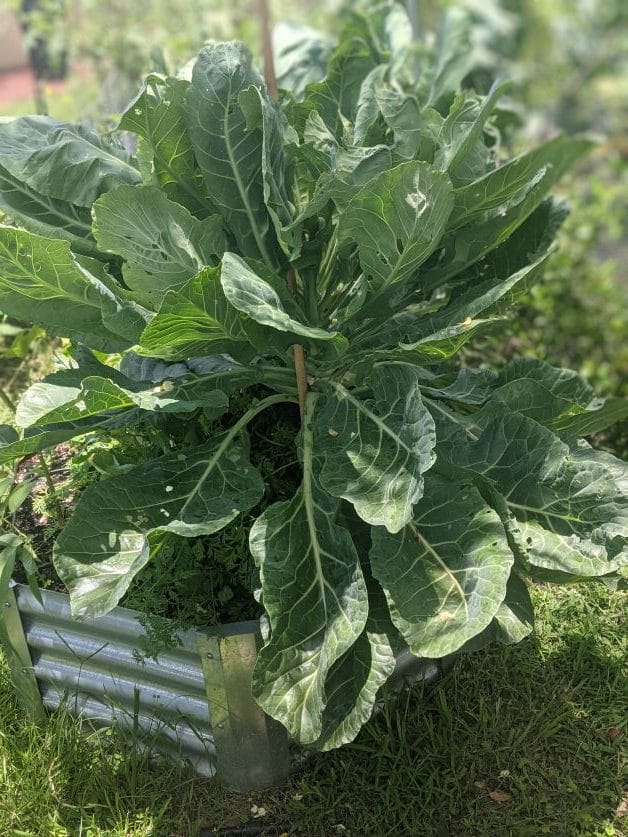
When it comes to harvesting full-grown collard greens, you can harvest the whole plant at about 8 inches tall.
Collards are also cut-and-come-again. If you let it keep growing and harvest the leaves from the stem as they mature, collard will continue to give you food over the course of a season. Mature collard green leaves taste the best at 7-10 inches long. You can eat them when they’re bigger, but they may be tough.
Harvest collard greens from the bottom up, taking the oldest, biggest leaves first. You can pull them off the stem with your hands, but I prefer to use a pair of clean scissors to cut them off to avoid accidentally damaging the plant.
The more you harvest, the more leaves your collard plant will produce. You can harvest quite a bit at once, but be sure to keep 4 or 5 leaves on the top of your collard stem so that your plant keeps growing.
How Long Do Collard Greens Keep in the Refrigerator?
Unlike other greens like lettuce, collard greens can keep for a few weeks in the refrigerator. Before you store them, wash any bugs or dirt from the leaves, pat them dry with a paper towel, and let them air-dry on the counter. It’s important that they’re completely dry before you store them.
It’s not absolutely necessary with collards, but I put all of my homegrown produce in green bags. One of the biggest benefits of growing your own food is the ability to pick them when they’re at their peak, but this causes homegrown produce to spoil quickly. Green bags help your fruits and vegetables last longer in the fridge by whisking away ethylene gas, a byproduct of ripening that causes your produce to spoil.
Can you Grow Collard Greens in a Container?
Yes, you can grow collard greens in a container but keep in mind that collards are a big plant with a deep tap root. If you are planting collards in pots, pick one that’s at least 5-gallons large and only plant 1 collard per container. Our DIY garden container is also a good choice.
Fill your collard container with 80% high-quality potting mix, 10% perlite, and 10% organic matter like oak leaf compost. Also, be sure that all the drainage holes are drilled out at the bottom of your container.
When it comes to watering, vegetables grown in a container take some vigilance. Because containers dry out quicker than the ground, check them every day. Stick your finger into the soil and if it’s dry up to your 2nd knuckle, give your collards some water.
Collard Greens Troubleshooting
Pests
Aphids
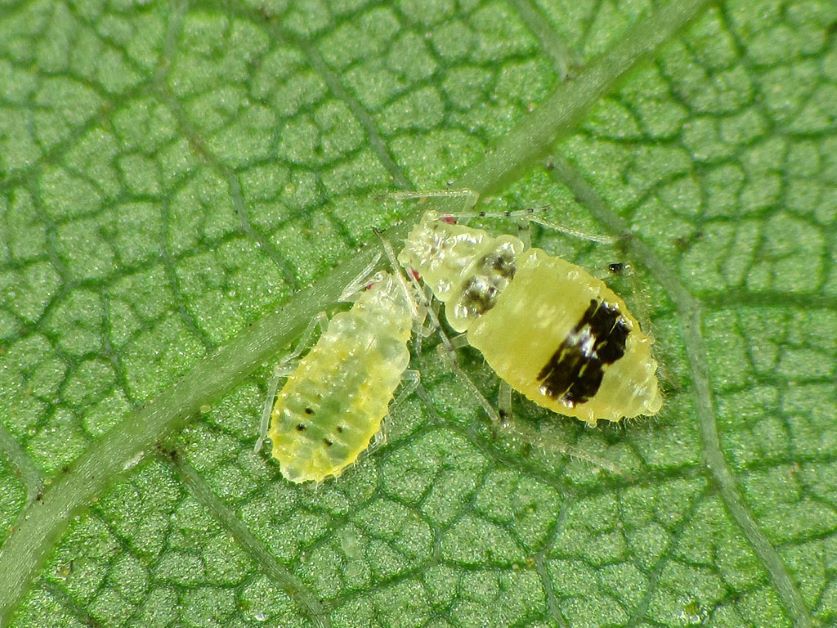
Aphids love leafy greens, collards included. Although annoying, aphids are easy to handle as long as you keep them under control. Check under your collard leaves every couple days (every day is best, but I know that can be hard) and if you see any aphids, give them a blast with your hose. Aphids have a delicate, soft body – a quick shot of water will kill them. A few aphids can turn into a full-blown infestation overnight, however, so it’s important to stay on top of scouting and spraying.
For more information, check out my guide on organic aphid control.
Cabbage Loopers
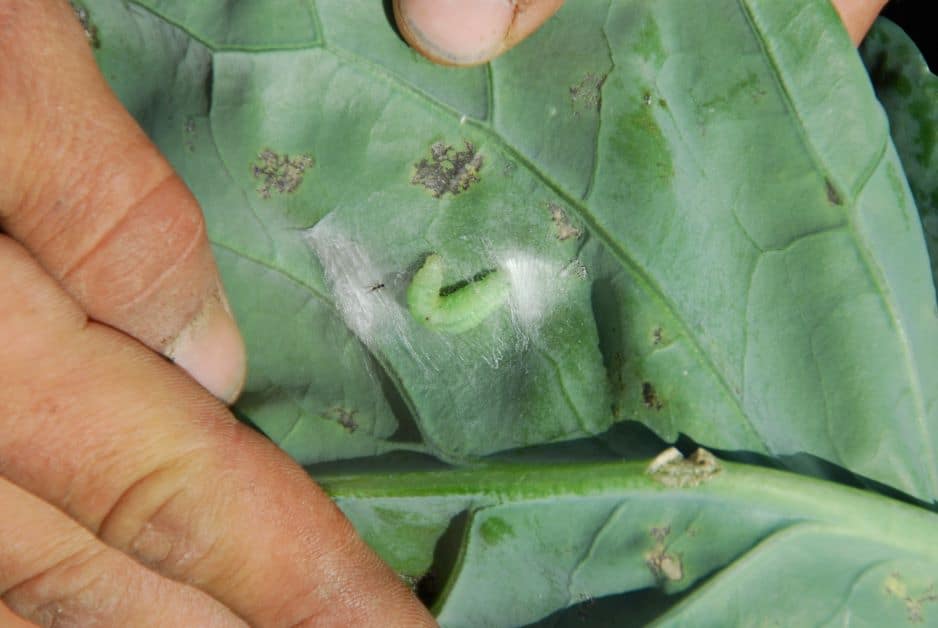
Cabbage loopers are a pest that attack members of the Brassica family. They are the caterpillars of a moth and they chew holes through your leaves.
You can scout for cabbage loopers and pick them off by hand. They tend to hide under leaves. If the infestation is bad enough, then you can use Monterey Bt spray. This organic bacteria doesn’t harm pollinators, but it does kill beneficial caterpillars like monarchs. If you can, try to pick cabbage loopers off by hand before resorting to spraying. If you do have to spray, spray at night and when the weather is dry. If it rains after you apply Bt, you’ll have to spray again.
Root-Knot Nematodes
Some sources say that root-knot nematodes can be a problem for collard greens. Personally, this is one of the only vegetables I’ve grown that haven’t been targeted by these devastating pests. Root-knot nematodes are a huge problem for the majority of Florida gardeners.
Plant marigolds in your vegetable beds to help deter root-knot nematodes. There are also organic nematode control sprays on the market, but the jury’s still out on how effective they are. I use them out of desperation because the only other way to eradicate nematodes is to solarize your beds. Solarization requires you to kill your crops, cover the soil with clear plastic, and scorch your soil with the power of the sun.
Other ways to prevent root-knot nematodes include:
- plant nematode-resistant varieties
- rotate your crops
- plant cover crops between planting seasons
Diseases
Most collard diseases are caused by overly wet weather, high humidity, and naturally-occurring bacteria in the soil. Out of all the collard plants I’ve grown, I’ve lost 1 to black rot and have seen signs of leaf spot on others. I’ve never had any issues with mildew (although I have on almost every other plant I’ve grown). For me, collards are usually disease-free. If you do encounter any issues, they’ll more than likely be one of the diseases below:
Black Rot
Black rot is a bacterial infection that spreads through soil that splashes up on leaves during watering or heavy rains. Signs of black rot include dying seedlings, brown crunchy spots on leaves, and in the most severe cases, black gunk on the inside the leaves and stems.
You can prevent black rot by watering your plants at the base and making sure to spray off any soil that may end up on your leaves. There aren’t any effective cures for black rot, but some say an early season application of organic copper fungicide can help prevent it.
Alternaria Leaf Spot
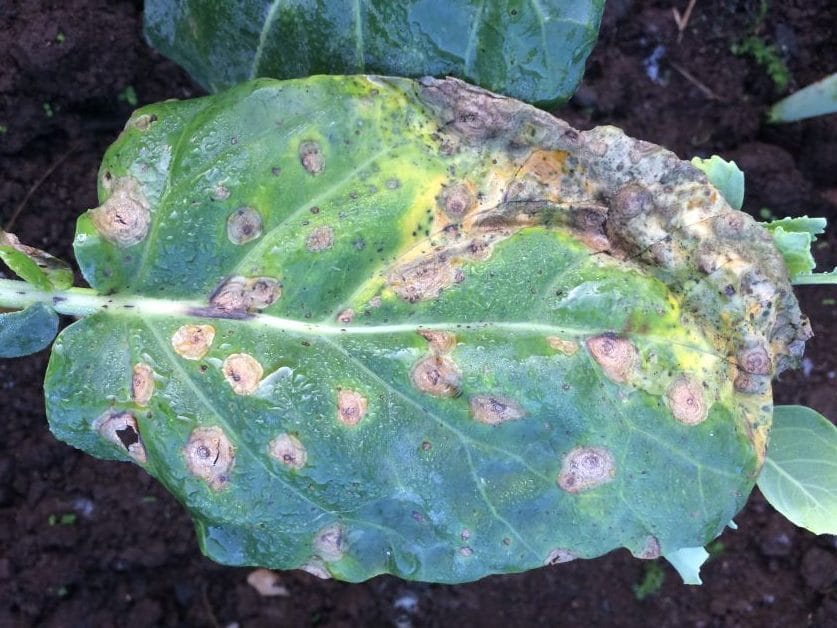
Leaf spot is similar to black rot in cause, appearance, prevention, and treatment. The main difference is that leaf spot doesn’t cause black gunk like black rot does.
Downy Mildew
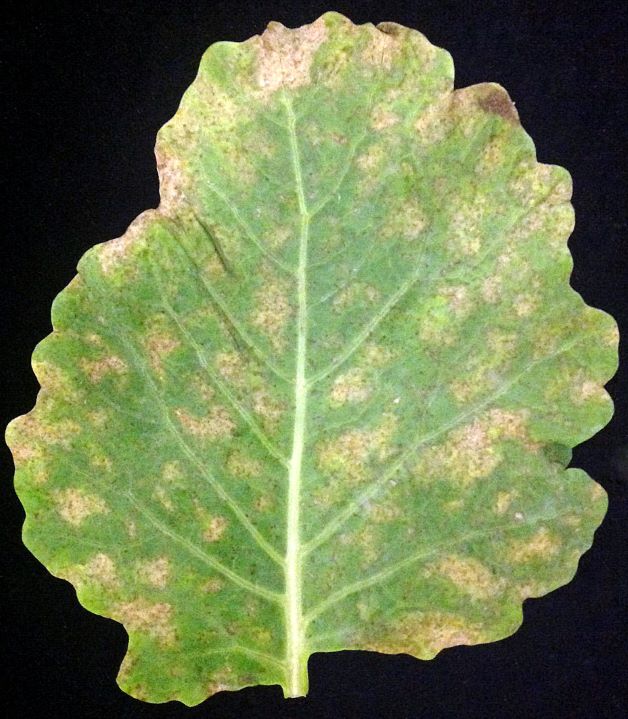
Downy mildew can be an issue with collard greens for some. This disease presents itself as yellow spots on top of leaves and white spots on the underside. This usually starts on the oldest, bottommost parts of the collard plant.
You can prevent downy mildew by keeping leaves dry and soil-free and rotating your crops. Organic copper fungicide can also help prevent mildew issues, but once your plant has contracted the disease, it’ll have little to no effect.
Are there Other Heat-Tolerant Greens?
Yes! Check out our list of the best greens to grow in Florida.